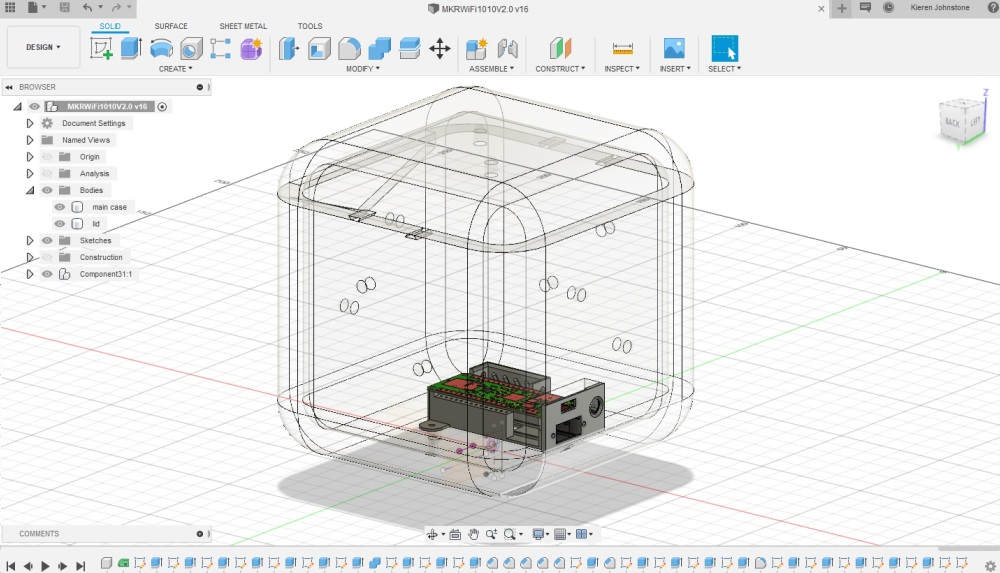
The Flashers themselves will be 3d printed. Recently at Red River we invested in a Creality CR-10S, and a few of us have been upskilling in Autodesk Fusion 360. I have some experience with CAD and SketchUp, which came in handy.
I’m far from a Fusion 360 expert, but am able to sketch, extrude, combine and smooth edges – meaning I’ve been able to muddle through so far!
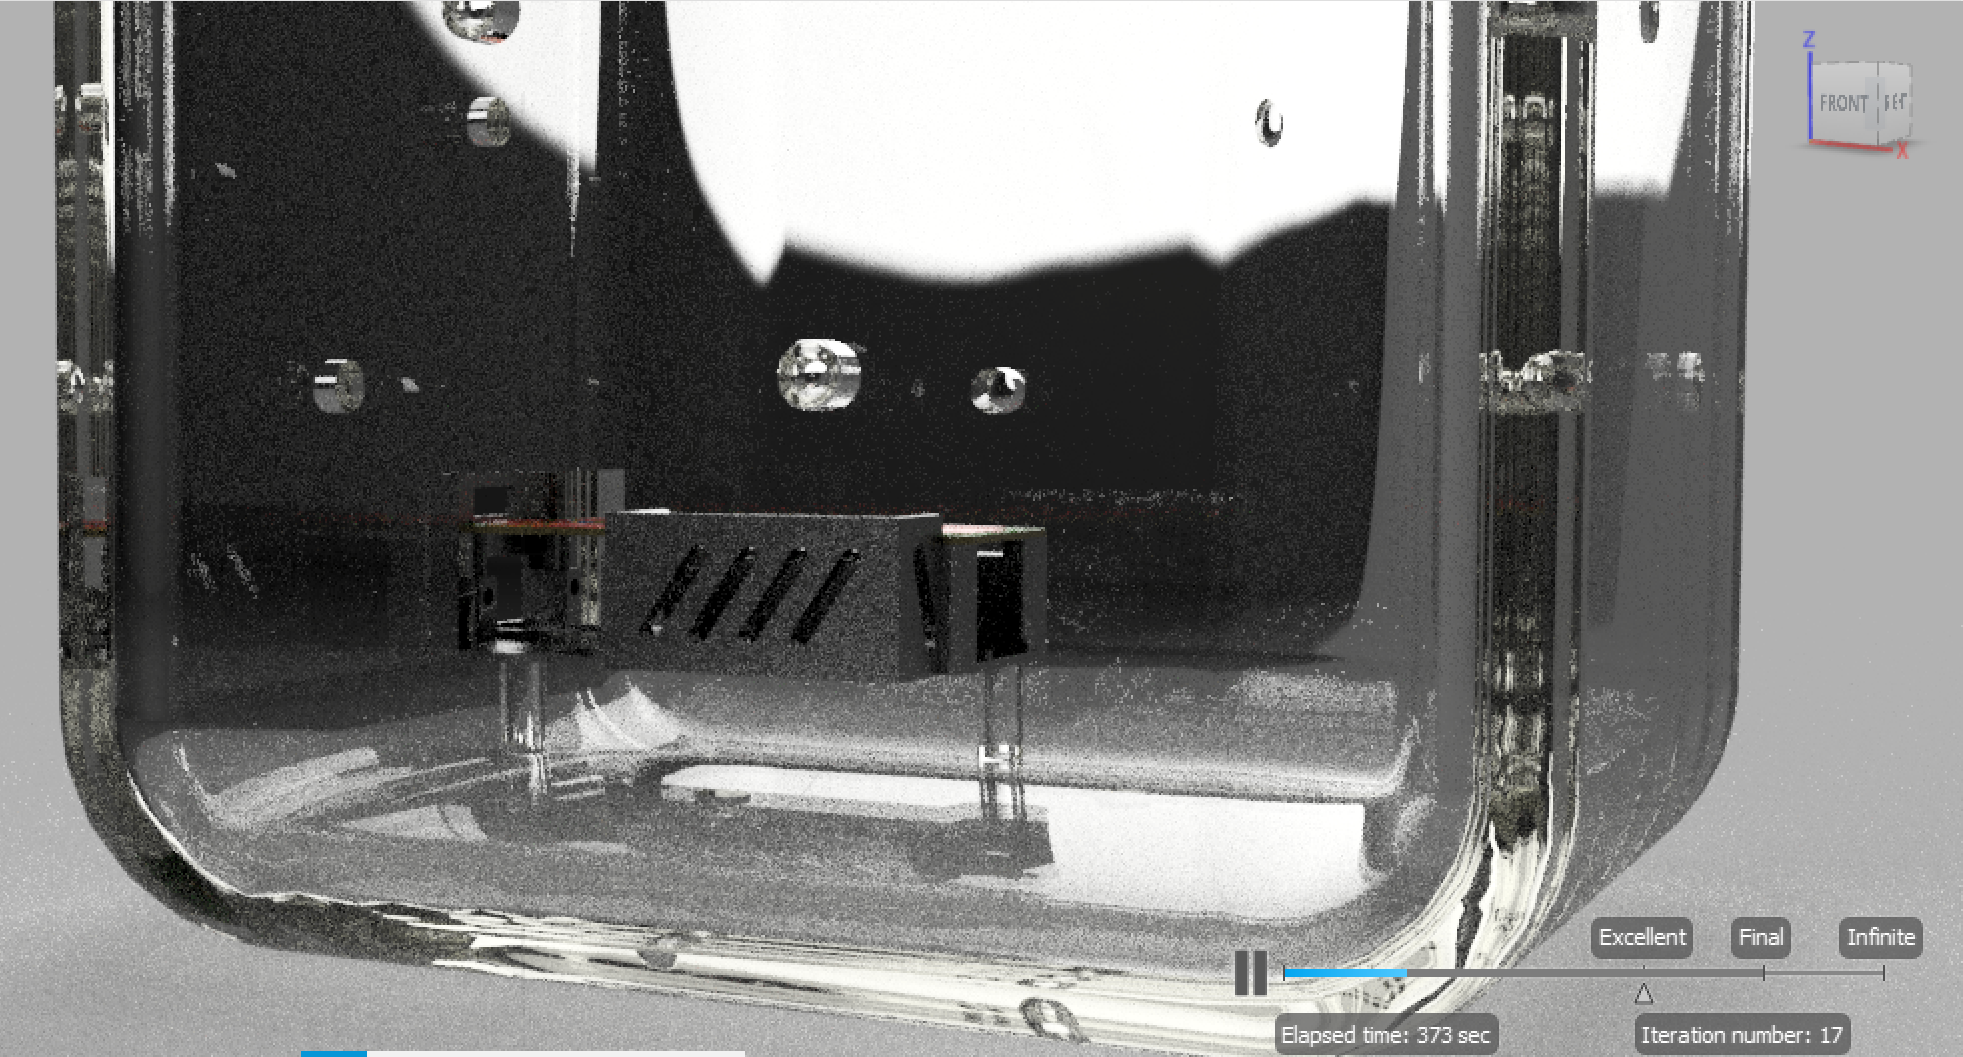
To convert 3d models to instructions a 3D printer can understand, you use a type of software called a slicer. We’ve been using the open source Cura tool.
Depending on quality settings and size, prints can either be a bit slow (a couple of hours for the Arudino housing) to really really slow (25-30 hours for the main body above, probably).
However, the material (PLA or ABS) is relatively inexpensive, and you can try something, tweak the settings or model design, and try again. For instance, here are some iterations of the Arduino housing:
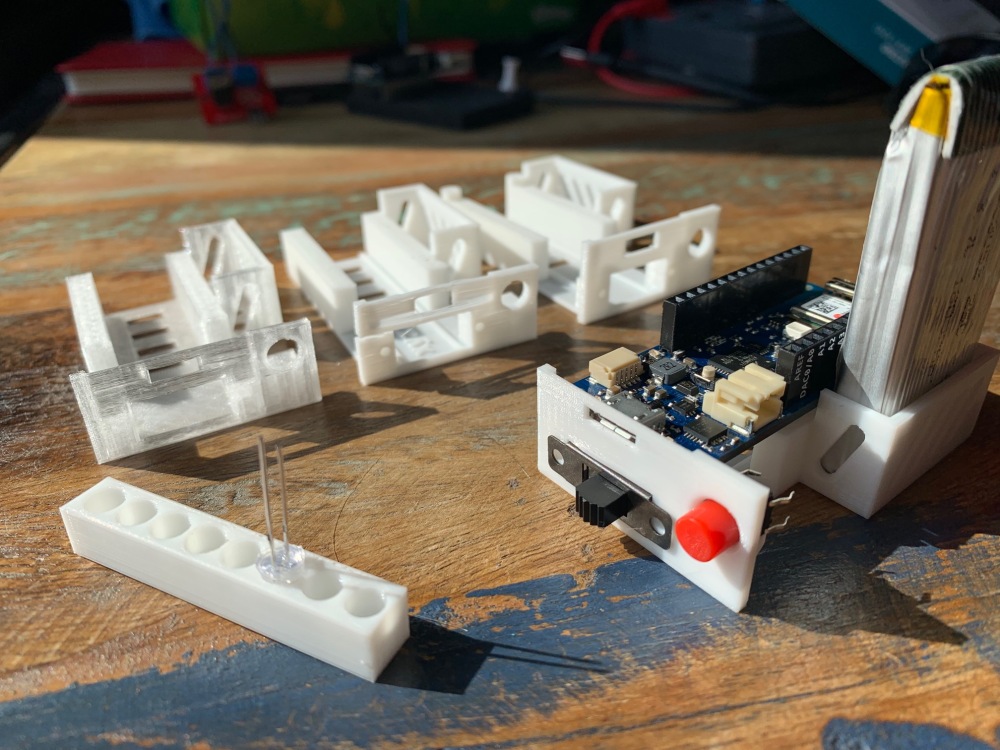
Also pictured: a test block with holes of various sizes, to see what the best fit was for the Flashers’ LEDs.
Version 1 here used transparent PLA, which looked good – but ultimately the material had either taken on too much moisture or was of low quality and the spool became brittle. I tried a very thin print at the front such that the USB connector housing would “poke through” (a bit like those metal motherboard panels). That didn’t work particularly well, even with a 0.2mm nozzle: it was too thin.
Version 2 adjusted the front panel some more, but ultimately some heavy-handed testing confirmed the “poke through” approach wasn’t a good one.
With version 3, I raised things 2mm, adding some screw holes for the board. Version 4 – hopefully just one off the final – smoothed off the push-button hole, tweaked the USB housing dimensions once again and was printed at a 0.12mm layer height. The previous were all 0.2mm height, but apparently with a 0.2mm nozzle, that’s a stretch.
The next (and maybe final) version includes:
- Tabs with holes for attaching to the Flasher housing itself
- Another adjustment to the hole for the USB connector
- A little more height for structural strength
This whole process was made easier by the fact that Arudino boards are open-source, and indeed the schematics and board layouts are freely available. In fact, they are available in EAGLE format, which I was surprised to learn was acquired by AutoDesk – and so with a couple of clicks, I had a 3d model of the board in Fusion 360, ready to model around.
This morning I’ve been trying to track down some high-quality transparent PLA: I settled on MatterHackers as a manufacturer. They don’t ship to the UK, so for the first time, I’ve signed up for a forwarding service. Hope it’s worth it!
